Step 1:
Downlaod Openfire from this link http://www.igniterealtime.org/downloads/
or you can download openfire from this website http://www.igniterealtime.org
step 2: Exact tar file
Step 3: go to bin folder and run this command
./openfire start
On your terminal you get such message
openfire/bin$ ./openfire start
testing JVM in /usr ...
Starting openfire
step 4: Now go to browser and hit url
localhost:9090
if you use local machine otherwise use ip address of machine. We can see such page and click to continue .
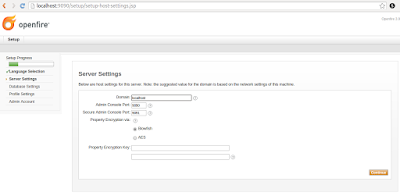
Step 5: In this step you will select domain and admin port. By default admin console port 9090 and secure admin port is 9091.Domain is ip address of machine. If you want to run openfire then you can use localhost as domain. Click continue for step step of openfire installation.
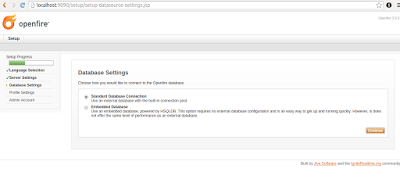
Step 6: In this step of openfire installation you will select database settings. If you donot know about it more i suggest to you click continue .
Step 7 : In this step you will select database for openfire. For example if i use mysql database then i fill all fields as requirement . i select mysql database then in database url i fill up database name and mysql hostname and more parameter as my requirements . There is usename mysql usename and password is mysql password.
Step 8: Click to continue:
Step 9: In This Step you will step administrator account of openfire. Select password for openfire admin.
Step 10. Click Login to admin console of openfire.
Step 11. Use usename and password for openfire administration , which are you have selected during openfire installation .
Step 12: See Openfire Admin Account as
After that you need to learn this tutorial for openfire devlopment Openfire Tutorial
Related Posts:
Connecting to XMPP IM with Smack for Java applications
Login to XMPP IM with Smack for Java applications
Get Roster List From XMPP IM with Smack API in Java Application


No comments:
Post a Comment